
Project Tomorrow Walkthrough: All Three Regions in Order
A full Project Tomorrow walkthrough across Suncrest, Tidehaven and Winterbloom: progression, region goals, population targets and modifiers.
Project Tomorrow's Early Access launch has three regions: Suncrest, Tidehaven and Winterbloom. Each region asks you to build a base, terraform the ground, grow a population and survive waves. Completing a region unlocks the next one and, after the tutorial region, the Modifier system. Source: Project Tomorrow Steam news ↗
This is a route, not a transcript. It tells you what to do in each region, in what order, and which systems become mandatory when. It avoids exact story spoilers because the game has little story; the progression is the point.
The short version: Suncrest teaches, Tidehaven automates, Winterbloom punishes.
The progression loop
Every region follows the same shape:
- Land and power up. Place the first windmill and establish a build radius.
- Secure oxygen. Build an Oxygen Emitter and stay inside the green zone.
- Build the workbench. Unlock gear, consumables and housing components.
- Survive the first wave. Use the wall-and-turret pattern.
- Terraform. Add Hydro Infuser and Thermal Drill, upgrade the cluster.
- Grow population. Build Habitats, survive waves, reach the population target.
- Complete the region. Repair, restock and move on.
The order is not negotiable in the first region. In later regions you can compress steps, but skipping defense to rush terraforming is how runs stall.
Region 1: Suncrest
Suncrest is the tutorial region. The August 22 patch made it friendlier: oxygen, thirst and health drain more slowly, early waves are smaller, and there are more tutorial prompts.
What to do:
- Follow the prompts until the windmill is down. The game is teaching the build radius.
- Build the Oxygen Emitter early. Point it toward the side you want to expand.
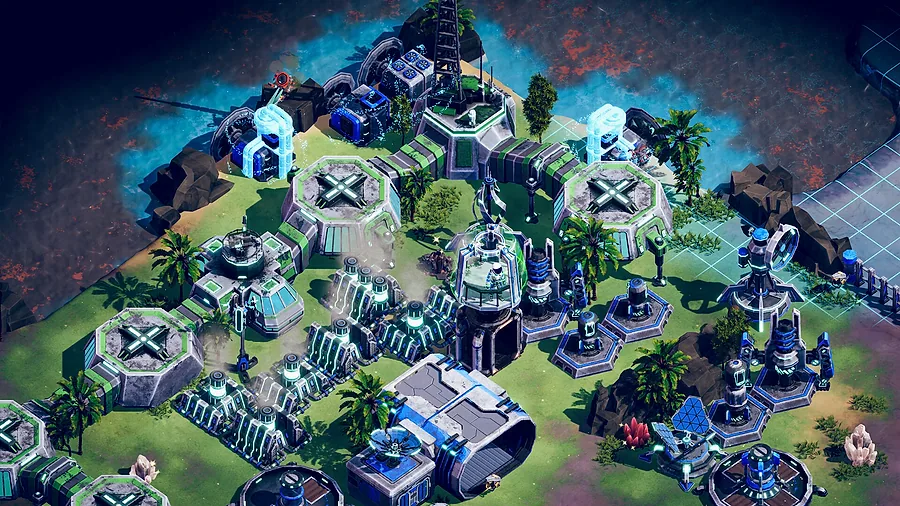
- Build the Workbench. One Silicone is the best value in the game.
- Wall the announced attack direction. Suncrest attacks from one direction in the opening.
- Survive the first wave, then build a Habitat. Population only increases after a survived wave.
- Add Hydro Infuser and Thermal Drill. This is where terraforming becomes a cluster.
- Push population to the region target. The demo used 30; the full game may differ.
- Build the Teleport Relay when it unlocks and keep it powered.
Suncrest is also where you learn the wave timer. Every build advances it. If you chain-build the terraforming cluster, the next wave arrives before you have repaired the wall.
Do not leave Suncrest without understanding the adjacency bonus and the repair rule. Both are tested harder later.
Region 2: Tidehaven
Tidehaven is the automation region. The September 16 patch describes it as a volcanic wasteland turning into a tropical oasis. It introduces the Resource Hub, gathering drones, water and food production, flying enemies, and the Interceptor and Nova Mortar.
What changes:
- Automation. The Resource Hub stores resources and sends drones to gather. Each harvest still advances the wave timer.
- Food and water production. Supply crates are scarcer. Build production before you run out.
- Flying enemies. Walls no longer cover everything. Build Interceptors near the inner ring.
- Two lanes. The defense splits into two kill zones rather than one wall chord.
- New turrets. The Interceptor handles air; the Nova Mortar handles dense pushes.
What to do:
- Establish power and oxygen as usual.
- Build the Resource Hub early; automation pays for itself over a long region.
- Add food and water production before the first long wave.
- Wall both lanes, but keep the walls short.
- Put Interceptor coverage over the housing and terraforming cluster.
- Add a Nova Mortar to the primary kill zone once the swarm density rises.
- Grow population to the target, then complete the region.
Tidehaven is where a player who only built ground turrets stalls. The air wave does not care about the wall.
The Tidehaven guide→ goes deeper on automation and the new enemies.
Region 3: Winterbloom
Winterbloom is the endgame region of the Early Access launch. The October 6 patch introduced it with Guardians, new enemies, new modifiers and powerful turrets. It is cold, heavy and unforgiving.
What changes:
- Guardians. Heavily armored, high health, area damage. Gauss Cannons and layered walls are mandatory.
- Air plus ground. The region mixes flyers with heavy pushes.
- Heat pressure. Thermal Drills and heat management matter more.
- Longer front. Three wall lines are safer than one.
What to do:
- Establish power, oxygen and heat immediately.
- Build a Gauss Cannon behind the first wall before the first heavy wave.
- Layer the defense: outer slow line, mid kill zone, inner housing line.
- Keep Interceptors near the inner ring.
- Upgrade the terraforming cluster only after the defense holds.
- Push population to the target, then finish the region.
Winterbloom is not a region to rush. A fast economy invites a wave you cannot stop. Build the defense first, then the terraforming.
The Winterbloom guide→ covers the Guardian fight and the three-layer layout.
What carries between regions
Project Tomorrow's regions are separate scenarios, not one continuous open world. The demo showed two missions with separate bases. Expect each region to start with a new base and a new resource field.
What carries is knowledge:
- The build order.
- The adjacency bonus.
- The wave timer discipline.
- The turret roles.
- The population chain.
Do not expect to carry resources or buildings between regions. Plan each region from scratch.
Population targets
Each region has a population goal. In the demo, the first region's goal was 30 and completing it awarded four stars; five stars required continuing to optimize. The full game's targets may differ.
The population chain is:
- Craft a Housing Frame.
- Build a Habitat inside the green zone and the power grid.
- Survive a wave.
- Population increases.
- Repeat until the target.
Habitats get more expensive in Oxygen with each build, so the target is also an economy check. If you cannot afford the next Habitat, your terraforming cluster is behind.
Modifiers
After the tutorial region, the Modifier system unlocks. You can equip Challenges to increase difficulty and Buffs to gain advantages. Challenges raise the region's score potential; Buffs make the run easier. The modifiers guide→ explains the trade.
For a first playthrough, finish the regions without stacking Challenges. Learn the waves, then add pressure.
Completion and cleanup
Before you leave a region:
- Repair every wall.
- Spend remaining Upgrade Cores.
- Collect the wave rewards.
- Check the achievements list for region-specific completions.
- Save.
The achievements guide→ lists the region completion achievements and the 10-machine challenge.
If you are starting the game for the first time, read the beginner guide→ first. If you are stuck in a specific region, jump to the Tidehaven→ or Winterbloom→ guide.
FAQ
How many regions are in Project Tomorrow?
Three at Early Access launch: Suncrest, Tidehaven and Winterbloom.
How long is the game?
The store page does not list a completion time, and the game is in Early Access. The demo's first region took roughly an hour at a relaxed pace.
Do resources carry between regions?
No. Each region is a separate scenario with a new base.
When do modifiers unlock?
After completing the tutorial region. Challenges add difficulty and score potential; Buffs add advantages.
Sources
- Project Tomorrow on Steam ↗
- Project Tomorrow Steam news ↗
- Project Tomorrow achievements ↗
- Wolfman Mazy demo gameplay ↗
Official source: Project Tomorrow on Steam ↗ Project Tomorrow guides and walkthroughs