
Project Tomorrow Resources: Every Ore and What It Is For
A practical guide to Project Tomorrow resources: Cobalt, Iron, Silicone, Copper, Magnetite, Water, Oxygen and Heat, where they go and what to gather first.
The demo uses five mined materials — Cobalt, Iron, Silicone, Copper and Magnetite — plus Water, Oxygen and Heat as base resources. Iron and Silicone carry the first hour; Magnetite becomes the housing bottleneck. Source: Project Tomorrow on Steam ↗
Project Tomorrow does not drown you in resources. There are five ores, three base resources and a small set of crafted components. The difficulty is not memorizing a hundred items; it is spending the right material at the right time, because every gathering action also pushes the next alien wave.
This guide covers what each resource is for, which ones matter in the first hour, and how storage and the Resource Uplink change the way you gather.
The five mined resources
Iron
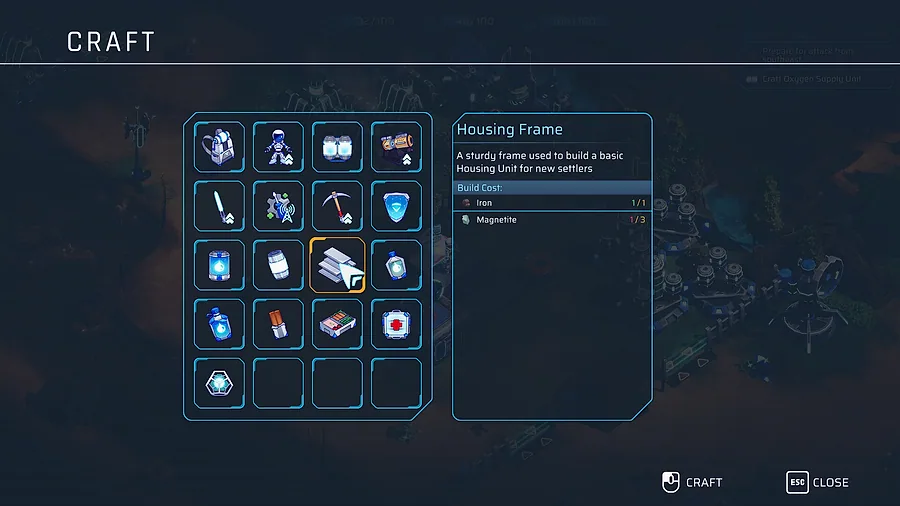
Iron is the backbone. It appears in structures, turrets, walls, repairs and the Housing Frame recipe. In the demo, the first windmill costs one Iron alongside one Cobalt, and the Housing Frame costs one Iron and one Magnetite.
Because Iron is used for both construction and repair, running out during a wave is dangerous. Keep a repair reserve of at least ten units once your wall line is up. If you have to choose between a new turret and a full repair, repair first.
Cobalt
Cobalt is the early power material. The first windmill costs one Cobalt and one Iron, and the second windmill follows the same pattern. Cobalt is also used in electrical components and some upgrades.
You do not need a large Cobalt stockpile in the first hour. Two windmills' worth is enough to start. Later, when you add relays and a second power district, Cobalt demand rises.
Silicone
Silicone is the terraforming and crafting material. The Oxygen Emitter costs Iron and Silicone in the demo, and the Workbench costs one Silicone. That makes Silicone the gate on your first terraforming machine and your first gear upgrade.
Gather Silicone early. A base with a windmill but no emitter has power and nowhere to spend it. A base with an emitter but no workbench has terraforming and no personal defense.
Copper
Copper is the upgrade material. It appears in electrical work and in later construction, and it becomes more important as you upgrade turrets and terraforming machines. In the first region it is a lower priority than Iron and Silicone, but do not ignore it entirely.
Copper nodes are worth marking on your mental map. When an upgrade needs Copper, you will want to know where the nearest node is without crossing the map.
Magnetite
Magnetite is the housing and advanced construction material. The Housing Frame recipe uses one Iron and one Magnetite in the demo, and housing is the main population gate. Magnetite is also used in higher-tier buildings and upgrades.
The housing cost rises with every Habitat, so Magnetite demand compounds. Build a storage buffer before you start a housing push. Running out of Magnetite with three Habitats queued is a common mid-game stall.
The three base resources
These are not carried in your backpack in the same way as ores. They are produced and consumed at the base level:
- Water — produced by Hydro Infusers and water buildings; used for hydration, housing and terraforming.
- Oxygen — produced by Oxygen Emitters; defines the safe green zone and is consumed by Habitats.
- Heat — produced by Thermal Drills; used for terraforming upgrades and advanced construction.
The distinction matters because a full backpack does not mean a healthy base. You can have fifty Iron and still be unable to build a Habitat because the base lacks Oxygen or Water. Check the base bars before you start a construction push.
Crafted components and collectibles
Two non-ore items deserve their own note:
- Housing Plates / Housing Frames — the habitat construction component. The demo's Housing Frame costs Iron and Magnetite. Build them at the workbench or fabrication building rather than carrying raw materials to the Habitat site.
- Sparks — collectibles tied to the achievement list. The achievements for 5, 10 and 15 Sparks confirm they are counted across the save. They are not a construction resource in the demo.
The release build has 75 items, so there will be more components than the demo shows. The rule stays the same: if a building lists a crafted component, make the component before you travel to the site.
What to gather first
A practical priority for the first region:
- Iron — 20 units. Covers the windmill, emitter frame, walls and repairs.
- Silicone — 10 units. Covers the Oxygen Emitter and Workbench, with a buffer.
- Cobalt — 4 units. Two windmills.
- Copper — 6 units. Early upgrades and electrical components.
- Magnetite — 4 units. First Housing Frame and a small buffer.
Do not strip every node in sight. The wave timer advances with every gathering action. Gather the next two buildings' worth, return, build, and defend.
Storage and the Resource Uplink
Storage Containers increase capacity and keep resources at the base. The Resource Uplink lets you use stored materials from anywhere once the container is connected to the network. In the demo, that removes the need to run back to base for every recipe.
The Uplink changes the gathering loop in two ways:
- You can build and craft from a forward position without carrying everything.
- You can leave resources in storage instead of risking them in your inventory.
It does not move items into your backpack. If a recipe needs an item in hand, you still need to carry it.
Automation and drones
Tidehaven introduces the Resource Hub and mining drones. The Hub adds storage and automates part of the gathering loop, while drones collect from nodes in the region. That reduces the manual gathering pressure but adds a new building to defend.
Automation does not remove the wave timer. The patch notes are explicit that gathering advances the next wave, whether you do it by hand or by drone. Plan the Hub as a defended building, not a fire-and-forget upgrade.
The automation guide→ covers the Hub and drone behaviour in detail.
When to expand to a new node field
Expand when the current field is outside your walls and the trip costs more oxygen than the ore is worth. A node field inside the green zone is always better than a richer field in the purple. Terraform toward the field before you build a forward mining base.
If a field is far away, build a relay, a small walled enclosure and a storage container. Do not build a second full base unless the region's population goal requires it. The base layouts guide→ has a forward-outpost pattern.
Resource mistakes that cost runs
- Spending the repair reserve on a new turret. Repair first.
- Ignoring Silicone. No emitter means no safe zone.
- Hoarding Magnetite without building housing. Population is the region goal.
- Gathering through the wave timer. Every node advances the attack.
- Building storage outside the wall. It is a free resource cache for the aliens.
If you are short on a specific material, the power guide→ explains which buildings consume it, and the survival guide→ explains which base resources keep you alive.
FAQ
What is Magnetite used for in Project Tomorrow?
Magnetite is used in Housing Frames and advanced construction. In the demo, a Housing Frame costs one Iron and one Magnetite.
Where do I find Copper?
Copper comes from nodes in the region, like the other ores. It is a lower priority in the first hour but becomes important for upgrades.
What are Sparks?
Sparks are collectibles counted by the achievement list. There are achievements for collecting 5, 10 and 15.
Does the Resource Uplink share storage across the map?
It lets you use stored resources from a distance once a Storage Container is connected. It does not teleport items into your inventory.
Sources
- Project Tomorrow on Steam ↗
- Project Tomorrow Steam news ↗
- Project Tomorrow achievements ↗
- Wolfman Mazy demo gameplay ↗
Official source: Project Tomorrow on Steam ↗ Project Tomorrow guides and walkthroughs