
Project Tomorrow Turrets: Pulse, Gauss, Interceptor and Nova
Which Project Tomorrow turret to build and where: Pulse Turret, Gauss Cannon, Interceptor and Nova Mortar roles, coverage, upgrades and anti-air placement.
Project Tomorrow's launch turrets cover four jobs: the Pulse Turret is the cheap all-rounder, the Gauss Cannon hits ground heavily, the Interceptor is the anti-air specialist, and the Nova Mortar is slow area damage. The Watchtower is a manned range and fire-rate boost, not a turret. Source: Project Tomorrow Steam news ↗
Turrets are the backbone of every Project Tomorrow defense. The game gives you four very different weapons and one support structure, and the mistakes come from treating them as interchangeable. A base with four Pulse Turrets is not automatically safer than a base with one Pulse, one Gauss and one Interceptor; it is just more expensive.
This guide explains each turret's job, where it belongs, and how to upgrade without wasting cores.
The four turrets at a glance
| Turret | Role | Strong against | Weak against | Where to place |
|---|---|---|---|---|
| Pulse Turret | General-purpose | Light ground, stragglers | Heavy armor, massed air | Gate and wall line |
| Gauss Cannon | Heavy ground damage | Armored ground, Guardians | Fast swarms, air | Behind the wall, long sightline |
| Interceptor | Anti-air | Flying enemies | Ground, especially heavy ground | Inner ring and air lanes |
| Nova Mortar | Area damage | Dense swarms, clustered pushes | Single fast targets, air | Behind the wall, covering the gate |
| Watchtower | Manned support | Everything, via range and fire rate | Nothing directly; it is a buff | Overlooking the kill zone |
The exact damage numbers are not published and will change during Early Access. The roles are stable because they come from the design: one generalist, one heavy hitter, one anti-air, one area weapon.
Pulse Turret: the default
The Pulse Turret is the first turret most players build. It is cheap, covers a reasonable arc and handles light ground enemies. It is not a boss killer.
Build Pulse Turrets:
- At the gate, one on each side if the gate is wide.
- Along the wall line, spaced so their arcs overlap.
- Behind the terraforming cluster's front wall.
Do not build a row of Pulse Turrets and call the defense finished. Against heavy enemies they will chip; against air they will miss.
Gauss Cannon: the ground hammer
The Gauss Cannon is the heavy ground option. It trades rate of fire for punch, which makes it good against armored enemies and bad against a swarm that surrounds it.
Placement:
- Behind the wall, with a long line of sight through the gate.
- On the flank where heavy enemies are expected.
- Covered by a Pulse Turret or a wall, because it is a priority target.
The Gauss Cannon is the answer to Guardians in Winterbloom. It is not the answer to a flock of flyers. Pair it with an Interceptor if the region has both.
Interceptor: the anti-air specialist
The Interceptor is introduced in Tidehaven and is explicitly strong against air and weak against ground. That is a fair trade, not a flaw. It exists because walls do not stop flying enemies.
Placement:
- Near the inner ring, where flyers head after crossing the wall.
- Overlapping the housing and terraforming cluster, not only the gate.
- Behind a wall, so ground enemies cannot reach it easily.
Do not replace ground turrets with Interceptors. A base of Interceptors loses to a ground push. One or two, placed where the air lane converges, is enough.
Nova Mortar: area denial
The Nova Mortar is the first area-damage turret. It is slow and expensive, and it shines against dense groups. In the Tidehaven patch notes it is described as a powerful addition that trades speed for coverage.
Placement:
- Behind the wall, aimed at the gate's kill zone.
- Where enemies bunch up, not where they spread.
- Near the terraforming cluster, to clear a breach before it reaches the machines.
The mortar is a support weapon. It does not replace a direct-fire turret; it makes the kill zone deadlier. If the wave is a single fast enemy, the mortar may never connect.
Watchtower: the force multiplier
The Watchtower is a manned structure. Enter it and your range and fire rate increase. That makes it a multiplier for your personal weapon and a strong addition to any kill zone.
Build one Watchtower:
- Overlooking the main gate.
- Inside the wall, with a clear arc.
- Near enough to the terraforming cluster to defend it.
Do not build five Watchtowers. One in the primary kill zone is enough; the resources are better spent on turrets.
Coverage: overlap, don't spread
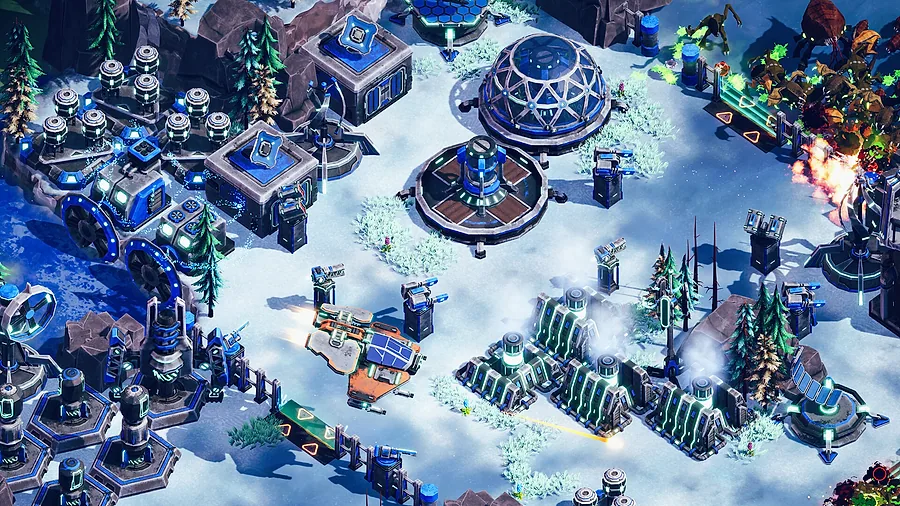
The most common turret mistake is spreading them evenly around the base. Even coverage looks tidy and defends nothing well.
A better rule: overlap in the kill zone, ignore the quiet sides.
- Two turrets covering the gate kill faster than four covering four walls.
- A turret covering empty ground is a turret not covering the breach.
- The quiet side becomes relevant only when the region adds a lane.
If a wave comes from a new direction, build a new cluster there. Do not redistribute the old one.
Power and upgrades
Every turret needs power. The grid bar shows the load; if it is above 70%, add a windmill before adding another turret.
Upgrade priority:
- The turret in the primary kill zone. It fires in every wave.
- The wall in front of it. A stronger wall keeps the turret alive.
- The anti-air turret if the region has flyers.
- The secondary lane once the primary is stable.
Upgrade Cores come from survived waves. Do not spend them all on damage; a wall upgrade often prevents more damage than a turret upgrade deals.
Turret placement checklist
Before you place a turret, ask:
- Is it inside the power radius?
- Does its arc cover the gate or the breach?
- Is it behind a wall?
- Is it overlapping another turret's arc?
- Is it far enough from the terraforming cluster that a blast does not hit both?
- Can you reach it to repair or rebuild?
If the answer to any is no, move it.
Common turret mistakes
All Pulse, no specialization. Heavy and air waves will punish it.
Interceptors at the front. They are weak to ground; keep them behind the wall.
Mortar on the frontier. Slow projectiles and a exposed position are a bad pair.
No Watchtower. The free range and fire rate are too good to skip.
Upgrading a turret outside the wall. It will be destroyed before it pays off.
Building turrets before the wall. The wall is the turret's armor.
The defense guide→ covers the wave checklist, and the base layouts guide→ shows where the turret clusters belong.
FAQ
What is the best turret in Project Tomorrow?
There is no single best turret. The Pulse Turret is the cheap generalist, the Gauss Cannon handles armor, the Interceptor handles air, and the Nova Mortar handles groups.
How many turrets do I need?
One ground turret covering the gate is the minimum. Add a second for a wide gate, a second lane or air. More than that is usually wasted coverage.
Do turrets need power?
Yes. An unpowered turret does not fire. Keep the grid below 70% load.
Where should Interceptors go?
Near the inner ring and the air lane, behind a wall. They are strong against air and weak against ground.
Sources
- Project Tomorrow on Steam ↗
- Project Tomorrow Steam news: Tidehaven and turrets ↗
- Wolfman Mazy demo gameplay ↗
Official source: Project Tomorrow on Steam ↗ Project Tomorrow guides and walkthroughs