
Project Tomorrow Power: Windmills, Relays and Brownouts
How the Project Tomorrow power grid works: windmill range, Power Relays, overload behaviour, reserve planning and when to build your next generator.
Power does two jobs in Project Tomorrow: it runs buildings and it defines where you can build. Windmills generate and project the build radius; Power Relays extend the grid without generating. On overload, the game shuts down the most recently built structure rather than the whole base. Source: Project Tomorrow on Steam ↗
Power is the first system Project Tomorrow teaches and the one new players most often misunderstand. The confusion is not the bar at the top of the screen. It is the relationship between power, build range and building order. A windmill is not just a generator; it is the anchor that lets you place anything at all.
This guide covers the grid from the first windmill to the late-game solar step, with the overload behaviour and a reserve rule that prevents silent brownouts.
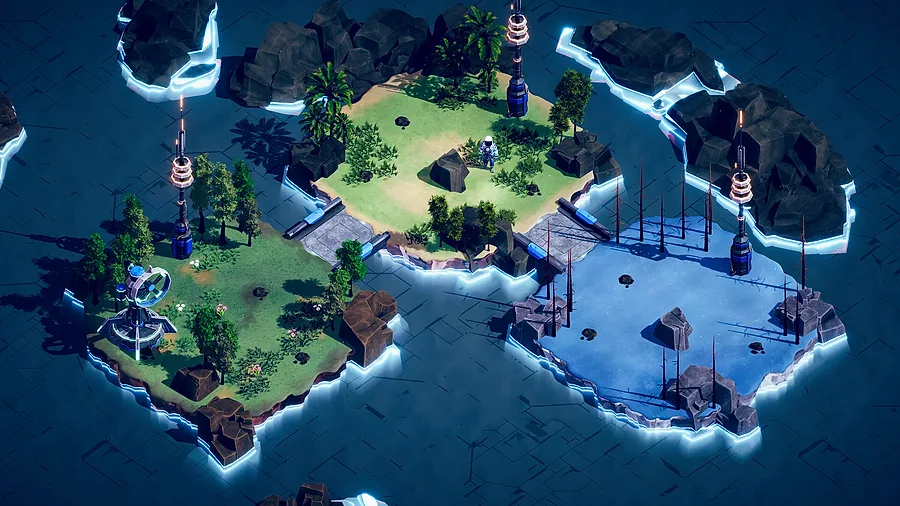
Electricity is not Heat
Project Tomorrow has two resource pools that look like power:
- Electricity, produced by windmills and consumed by buildings. This is the grid that determines whether a turret fires.
- Heat, produced by Thermal Drills and used by terraforming upgrades and advanced construction. Heat is a base resource, not the same bar as electricity.
The confusion is understandable because both are shown near the top of the screen and both gate construction. But a base with full electricity can still lack Heat, and a Thermal Drill does not power your turrets. Keep the two separate in your head: windmills run the base, Thermal Drills change the planet.
The first windmill
The windmill is the first building for three reasons:
- It generates electricity.
- It projects a build radius.
- It is cheap enough to build immediately.
In the demo, a windmill costs one Cobalt and one Iron. The tutorial gives you enough for two. Place the first one near the centre of your starting clearing, not at the edge. The radius is circular, and a central placement gives you the most usable ground in every direction.
Do not place the windmill on the front line. It is a power source, not a wall. If a wave reaches it, you have already lost the buildings it powers.
Power Relays extend, they do not generate
A Power Relay extends the grid to a new area. It does not produce electricity. Players build a relay, see the power bar unchanged, and conclude the relay is broken. It is working exactly as designed.
Use a relay when:
- You need to reach a resource node outside the windmill radius.
- You want to build a second defensive line forward of the base.
- You are expanding the terraforming cluster toward a new patch of wasteland.
Use a second windmill when:
- The power bar is near capacity.
- You need both range and generation.
- The new area will host several buildings, not just one.
A relay is cheaper for pure range; a windmill is better for a new district. Most early bases need one relay and two windmills.
How overload works
The demo's overload rule is forgiving but easy to miss: when demand exceeds supply, the game shuts down the most recently built structure. It does not shut down the entire base. That means your newest turret may be dark while everything else looks fine.
Two consequences:
- Check the power view after every build. A new building can silently push an older one offline if the order of construction changes.
- Build power before defense, not after. If you build a turret and then a windmill, the turret may be the one that stays online; if you build the windmill first, the turret has headroom.
The practical rule is to keep one building's worth of reserve. If the bar is at 90% and you are about to add a turret, add a windmill first. The cost of a windmill is small compared with a dark turret during a wave.
The power view
The power view shows the grid radius, the connections and the demand. Use it before every wave, not after. Look for:
- Buildings outside the radius (they will not be powered).
- A relay that connects to nothing (wasted materials).
- A windmill at the edge of the grid (easy to destroy).
- A cluster of turrets sharing one line (one breach disconnects all of them).
Power lines are not physical cables you can cut, but the grid is still a network. Concentrating all your generation in one corner makes the base fragile. Two windmills on opposite sides of the base are more resilient than one large generator.
Build order for a stable grid
A reliable early sequence:
- Windmill near the centre.
- Oxygen Emitter inside the radius.
- Workbench.
- Power Relay toward the attack direction.
- Pulse Turret behind the wall.
- Second Windmill when the bar passes 70%.
- Storage Container inside the defended area.
This order keeps the grid ahead of demand and puts the relay where it extends the defense, not where it extends the economy. Economy can wait until the first wave is survived.
Solar panels and the late-game grid
The developer's demo notes mention a Solar Panel as a later unlock, gated behind progression rather than available at the start. Solar is likely a supplement, not a replacement: windmills work at all times, while solar depends on the map's light.
Do not plan your first base around solar. Plan around windmills and relays, then add solar when the game offers it. If the panel has a placement condition (open sky, no obstruction), place it on the outer ring where buildings will not shadow it.
Brownouts during a wave
If a turret stops firing mid-wave, check three things:
- Power reserve. A building may have gone offline when a new one was placed.
- Destruction. A wave may have destroyed a windmill or relay, disconnecting a branch.
- Range. The turret may be outside the grid after a relay was destroyed.
You cannot repair during a wave in the demo. If a generator dies, the correct response is to fall back to the next line, not to run into the breach and rebuild. Rebuild between waves.
Power and terraforming
Terraforming machines draw power. A large cluster of Oxygen Emitters, Hydro Infusers and Thermal Drills can consume more than a starter grid produces. That is why the second windmill usually arrives around the same time as the second terraforming building.
The cluster also needs defense. A single turret covering three machines is efficient; three turrets covering one machine each is a waste. Put the power source behind the cluster, not inside it, so a wave that reaches the machines does not also take out the grid.
The terraforming guide→ covers the machine ratios and upgrade order; this page only covers their power draw. If the cluster keeps tripping the grid, build the next windmill before the next emitter.
A note on Heat
Heat is produced by Thermal Drills and consumed by upgrades and advanced buildings. It does not flow through the power grid. If a building says it needs Heat, building another windmill will not help. Build or upgrade a Thermal Drill, and keep it inside the defended perimeter.
Heat production is also a terraforming action: the drill changes the ground around it. Treat it as part of the cluster, not as a utility building on the edge of the map.
FAQ
Why can't I build in Project Tomorrow?
You are outside the power radius. Windmills create the radius and Power Relays extend it. Place a relay closer to the expansion site.
Do Power Relays generate power?
No. They only extend the grid. Build another windmill if the power bar is low.
What happens when power runs out?
The most recently built structure shuts down. The rest of the base keeps running. Check the power view and add generation before the next wave.
When should I build a second windmill?
When the power bar passes roughly 70%, or when you are about to add a turret and a terraforming building in the same cycle.
Sources
Official source: Project Tomorrow on Steam ↗ Project Tomorrow guides and walkthroughs