
Project Tomorrow Automation Guide: Resource Hub and Drones
How automation works in Project Tomorrow: the Resource Hub, gathering drones, extra storage, Resource Uplinks and the wave-timer cost of automated income.
Automation arrives in Tidehaven with the Resource Hub: extra storage plus drones that gather for you. The cost is tempo — every automated harvest advances the next wave, so automation makes the game faster as well as richer. Source: Project Tomorrow Steam news: Tidehaven ↗
Project Tomorrow's first region is hands-on: you walk to the node, you mine, you carry the ore. Tidehaven changes that with the Resource Hub and its gathering drones. For the first time, the base produces while you build.
Automation is powerful, but it is not a idle-game button. It interacts with the wave timer, the power grid and storage. This guide explains how the pieces fit and when to switch them on.
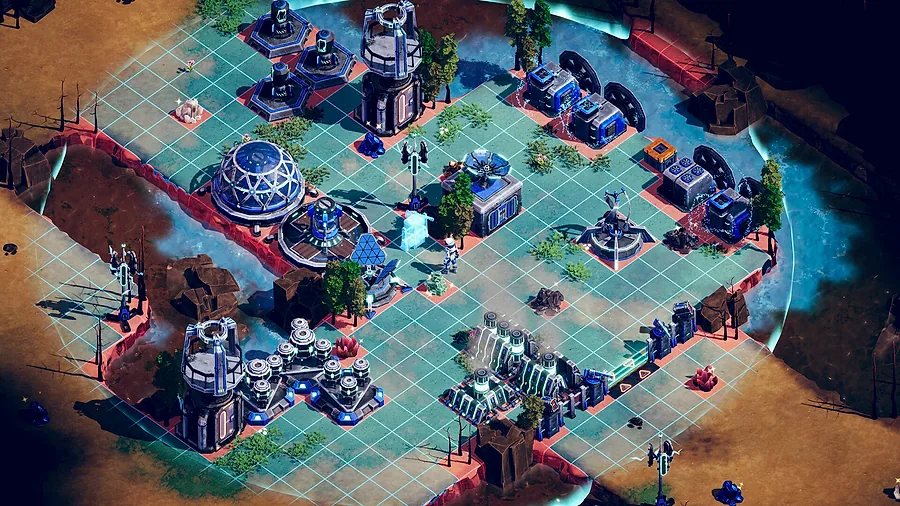
The Resource Hub
The Resource Hub is the automation building introduced in Tidehaven. It does two things:
- Stores resources beyond the base's normal storage.
- Sends drones to gather from resource nodes.
The patch notes describe it as extra storage plus gathering drones. The hub is the anchor of the automated economy; without it, the drones have nowhere to work.
Placement:
- Inside the wall.
- Inside the power radius.
- Near the storage and the Resource Uplink.
- Away from the gate, because it is a valuable target.
A hub outside the wall is a donation to the aliens.
How the drones work
Drones gather from nodes over time and return the resources to the hub. You do not need to escort them; that is the point. The trade is that each harvest counts as an action and advances the wave timer.
Practical rules:
- Do not queue every node. Pick the resources the current build needs.
- Keep a manual buffer. Drones are slow; the first wave after automation still needs hand-gathered materials.
- Watch the timer. A hub that gathers constantly shortens your preparation windows.
- Pause or limit gathering before a wave if the game allows it.
The drone system is a background income, not a replacement for exploration. Rare materials still come from trips.
Storage and the Resource Uplink
Automation only helps if the resources are usable. The chain is:
- Storage Container — holds bulk materials inside the base.
- Resource Hub — adds capacity and drone gathering.
- Resource Uplink — lets crafting pull from storage at a distance.
Without the uplink, you still carry materials to the workbench. With it, a forward workbench can craft from the main base's storage. That is the real quality-of-life jump.
Build the storage first, then the uplink. The uplink does not create capacity; it extends access.
Automation and the wave timer
This is the part that catches new players. The game advances the next wave when you build, gather or upgrade. Automated gathering counts. A hub running three drones is a hub advancing the timer three times as fast.
That does not make automation bad. It makes it a tempo choice:
- Automate when the base is stable. A strong wall and turret line can absorb the faster waves.
- Automate when you need a resource bottleneck solved. If Iron is the constraint, drones on Iron pay for themselves.
- Do not automate during a crisis. If the wall is broken and the population target is unmet, the last thing you need is a faster clock.
The safest pattern is to automate one resource at a time and check the timer after each change.
A safe automation setup
- Windmill capacity. Add a windmill before the hub; automation draws power.
- Storage Container. Build it inside the wall.
- Resource Hub. Place it next to the storage.
- Resource Uplink. Connect the network.
- One drone task. Start with the resource you are shortest on.
- Wall and turret check. The hub is now a target.
- Add a second task only when the timer feels comfortable.
Do not build the hub and three tasks in the same minute. You will not know which one caused the wave that broke the wall.
When not to automate
- Before the first wave. Manual gathering is enough.
- When the power grid is over 70%. The hub may push it over.
- When the wall is incomplete. A faster wave hits an unfinished defense.
- When you are saving for a Habitat. Automation spending can delay the population target.
- In a region without the Resource Hub. Suncrest does not have it; do not plan around it.
Automation in the late region
Winterbloom's economy is more demanding. The hub's storage and drones free you to focus on the Guardian fight, but the region's waves are less forgiving of a faster timer.
Use automation for:
- Iron and Magnetite for Housing Frames and repairs.
- Silicone for workbench items.
- Fuel or heat materials if the region requires them.
Do not automate a resource you are not spending. A full storage of Cobalt is not progress.
Troubleshooting
The drones are not gathering. Check the hub's power, the assigned node and the storage capacity.
The resources are not appearing in crafting. Check the Resource Uplink connection and the storage container.
The waves are too fast. Reduce the number of automated tasks or pause the hub.
The hub keeps getting attacked. It is inside the wall, right? If not, move it.
The power bar is red. Add a windmill before adding another task.
The Tidehaven guide→ puts automation in the region order. The power guide→ covers the grid load.
FAQ
When does automation unlock in Project Tomorrow?
With the Resource Hub in Tidehaven, the second region.
Do drones advance the wave timer?
Yes. Automated gathering counts as an action and advances the next wave.
What does the Resource Hub store?
Extra resources beyond the base's normal storage. It is both a warehouse and a drone hub.
Can I automate in Suncrest?
No. Suncrest is the manual tutorial region; automation arrives in Tidehaven.
Sources
Official source: Project Tomorrow Steam news: Tidehaven ↗ Project Tomorrow guides and walkthroughs